How to Read Ukulele Chord Diagrams
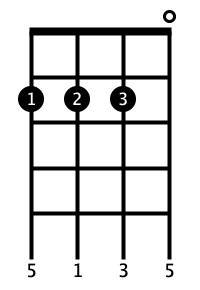
Chord diagram shows a specific fingering of a given chord. Horizontal lines represent frets. The thicker line (the top most) represents the nut (zero fret). Vertical lines respresent strings.
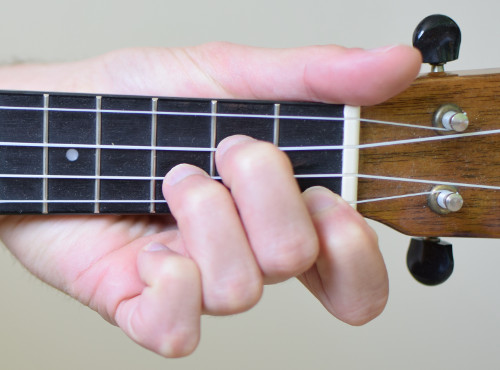
This is a Gm chord (in standard tuning on a soprano ukulele). Holding the diagram is shown on the photo.


Finger positions
The circles with numbers are the positions of fingers. The numbers represent fingers: 1 is index finger, 2 is middle finger, 3 is ring finger and 4 is the pinky.
Open and muted strings
An empty circle placed above the string means the string should be not held by any finger and it should be played. A cross above the string means the string should be not played - it should be muted. Here is an exapmle of diagram with muted string:

Barre
The line connecting finger positions means that you place your finger across these strings.


Fret number
When there is a number in left-top corner of the diagram, it means that the fingerings don't start at the fret zero (nut) but at the fret with that number. For example in this Bdim7 chord variant you place your index and middle finger on the fourth fret. Notice that the top-most fret is drawn with a thin (instead of thick) line because it is not the zero fret.


Chord intervals (for advanced players)
The numbers at the bottom of diagram are the intervals of chord notes. The diagram shows on which strings are the notes placed. For example the chord D has notes:
- D - root note (1)
- F# - major third (3)
- A - fifth (5)
One of the fingerings for D chord is:

It means the top-most string (holding on 2nd fret) plays the fifth of the chord i.e. note A.
You see that in this fingering the fifth of the note is played twice. It is useful when you are looking for a specific inversion of chords or just to understand the chord structure better.


